Request your personalized demo
By requesting a demo, you agree to receive communication from us. We’ll handle your info according to our Privacy Statement. By entering a phone number, you consent to receive phone calls and SMS from us.


Your Zenoti (formerly ManageMySpa) account was upgraded with the latest features on Oct 28th. Find out what’s new in this upgrade.
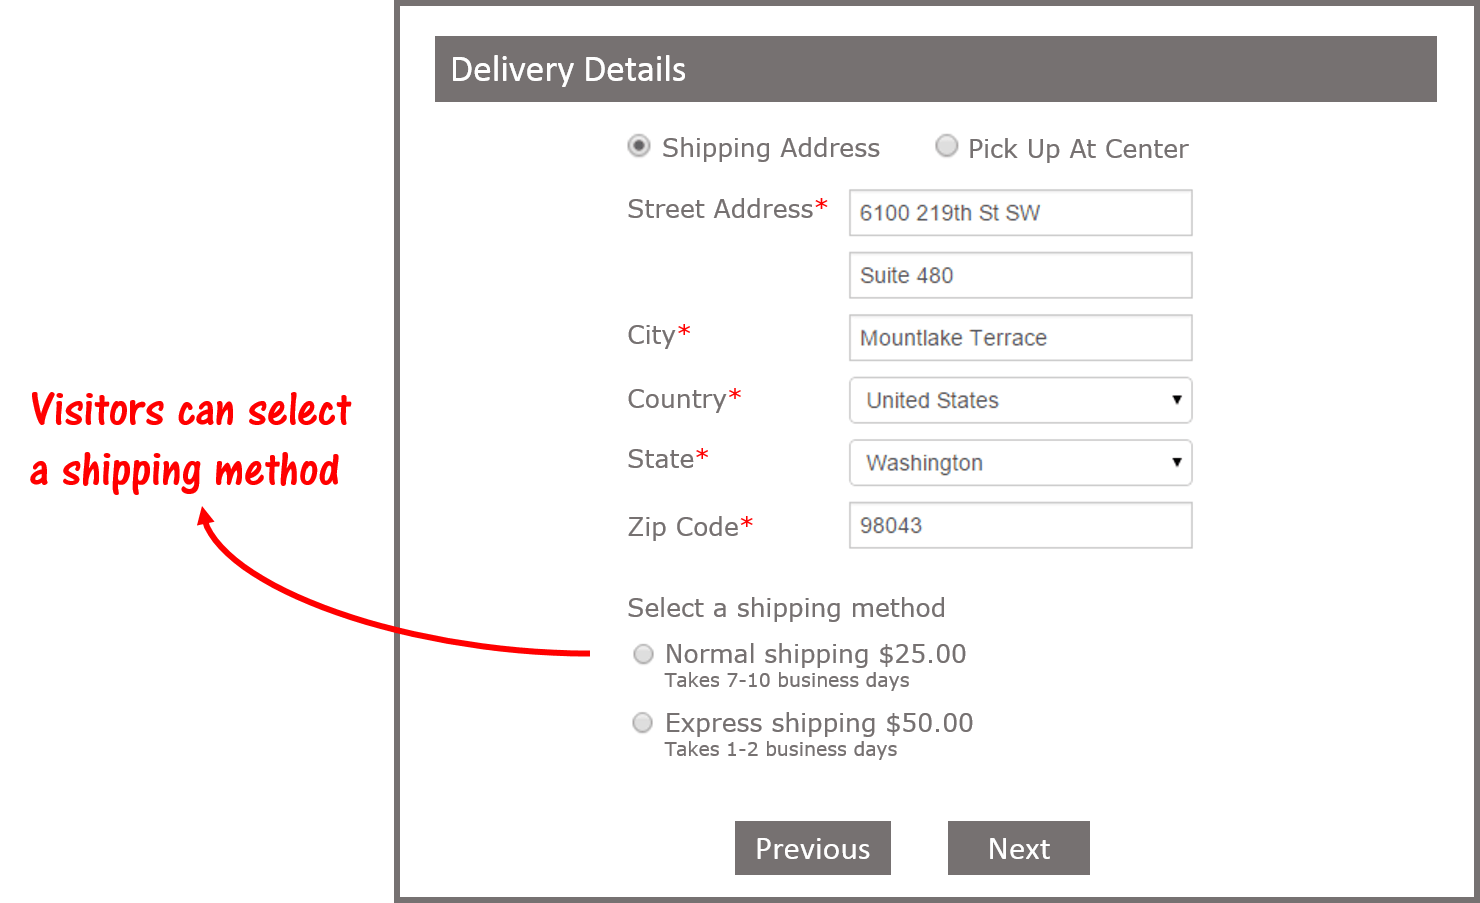
Allow customers to add a shipping address and calculate shipping cost for online purchases. Shipping charges are calculated based on the shipping method, the delivery address and the products purchased.
The system supports multiple shipping methods and can support international shipping requests.
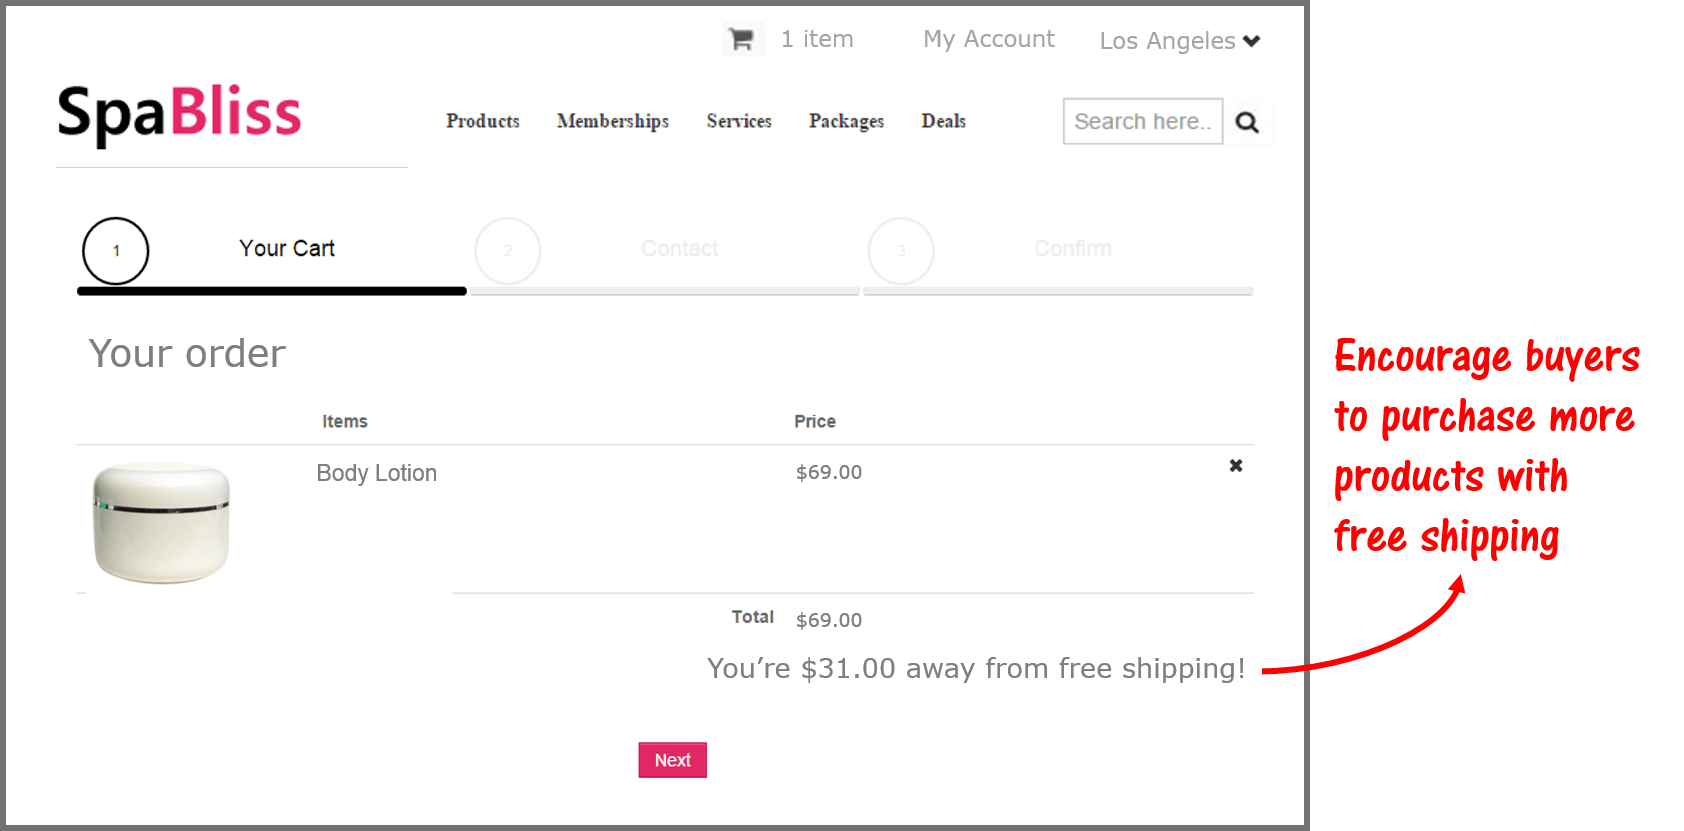
You can also offer free shipping when a customer reaches a minimum purchase amount. On checkout, the customer is reminded of the offer – which should help you increase online purchase totals.
If you’re shipping products within the US or Canada, the system will pick up the right tax amounts based on the delivery address.
For details on setting this up, contact support.
If you’re a multi-center chain, you’ll need to decide if you want online retail, memberships, series packages and gift card sales to go directly to the corporate office, or to a selected center.If you centralize online sales to the corporate office, accounting for incoming revenue is handled centrally. And reconciliation of revenue on redemptions is made easier. For example, if a customer visits your website to buy a gift card, the corporate office collects the revenue. When this gift card is redeemed at any center, the corporate office can transfer the redeemed amount to that center.Often packages, memberships and gift cards are not fully redeemed, in which case the unused revenue stays with the corporate office.To configure your webstore at the center level, navigate to Admin > Centers > Catalog at the center level and select items that you’d like to sell at each center.
Your webstore now has new pages for services, products, packages, memberships and gift cards. You can customize these pages by displaying banners, new and recommended services or products, day packages and more.To update these pages, ensure you’re in the organization view, navigate to Admin > Organizations > Catalog > Content to Display and choose what you’d like to display on each of these landing pages.
Most spas and salons offer a variety of treatments, in which case grouping services into categories helps the customer find what they’re looking for.However, if you have a limited number of services, you may want to display all of those services on a single page.
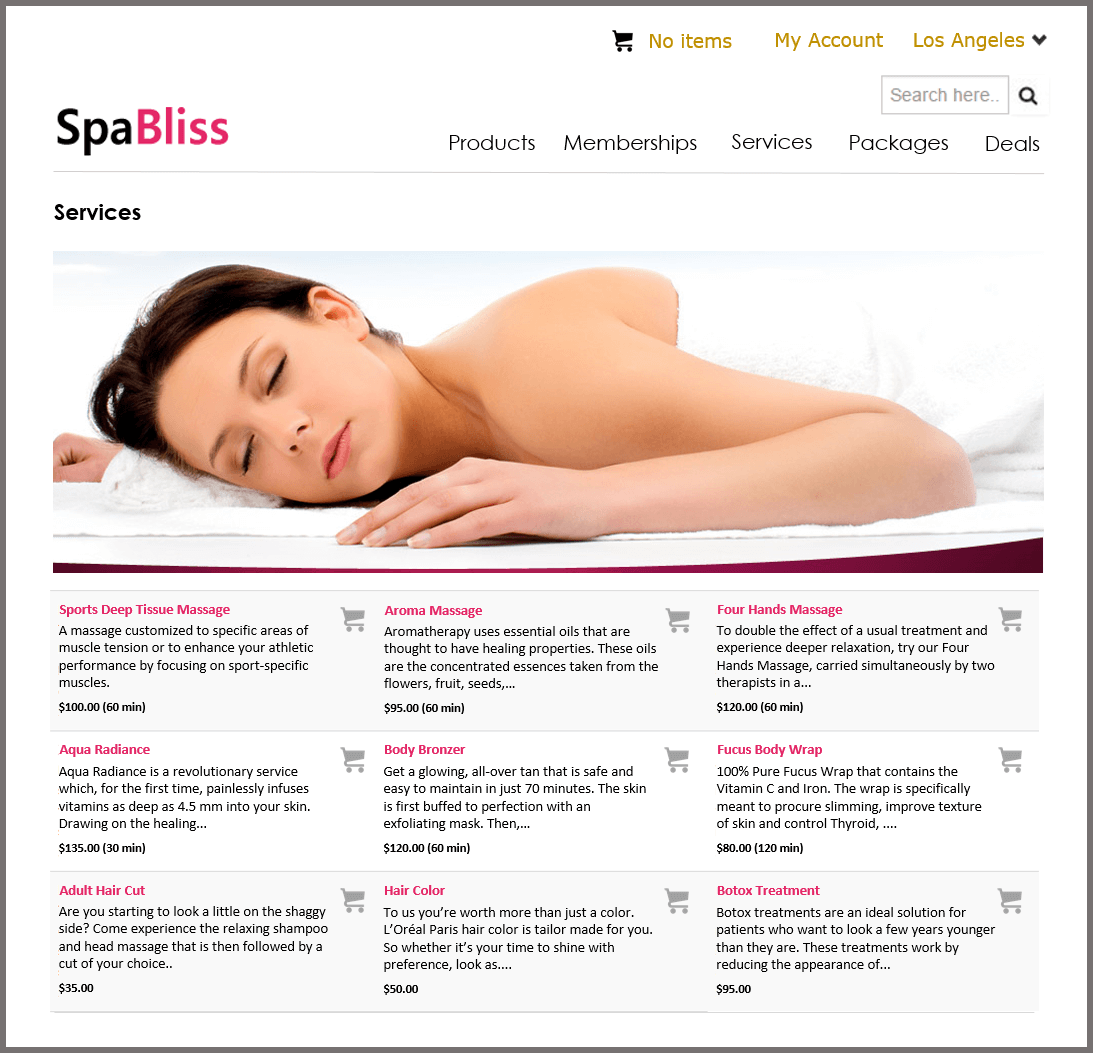
To enable this feature, ensure you’re in the organization view, navigate to Admin > Organizations > Catalog > Content to Display and select the checkbox “Show all items on clicking tag group”. Make sure you’ve disabled categories and tag groups.
When your customers visit your webstore (ecommerce website) for the first time, they’ll have to sign up to make a purchase. For an easy sign up process, you can make fields like mobile number and gender optional.
To make phone number optional on the sign up form, ensure you’re in the organization view, navigate to Admin > Organizations > Settings > Guests and select the checkbox “Mobile number is not mandatory”. This will make the phone number field optional in your appointment book too.
To make the gender field optional, ensure you’re in the organization view, navigate to Admin > Organizations > Catalog > Content to Display and select the checkbox “Show gender in webstore”.
In our September upgrade, we added the ability to send registration forms to a guest before their appointment. You could customize these forms by adding custom fields to a set of standard fields.
We’ve now added more standard fields like birthday, address, referral source and more. You can still add your own custom fields, for example, to collect detailed information on the guest’s medical history, nutrition habits, allergies, etc...
Preventing late cancellations and no-shows is easier when you've defined clear policies for such cases. And to implement policies that involve charging customers for not showing up for an appointment or cancelling the appointment at the last moment, you'll need to collect their credit card details before the appointment. Our new upgrade allows you to make it compulsory for your customers to provide their credit card details before booking their appointment. The system securely stores this information and allows you to apply the penalty charges when required. To enforce your customers to submit their credit card information before booking the appointment, ensure you're in the organization view, navigate to Admin > Organizations > Settings > Appointment Book and select the radio button "Block if not on file" for "Require Credit Card For Appointment Booking". You can also select "Warn if not on file" to allow your customers to book appointments but warn your front desk if they do not submit their card details. This will remind your front desk staff to get this information while confirming their appointments on the phone.
Do more with prescriptions and prescription sets.
The front desk can create prescriptions from existing prescriptions sets in the system and assign a doctor. The doctor will get notified through an email or a text message.
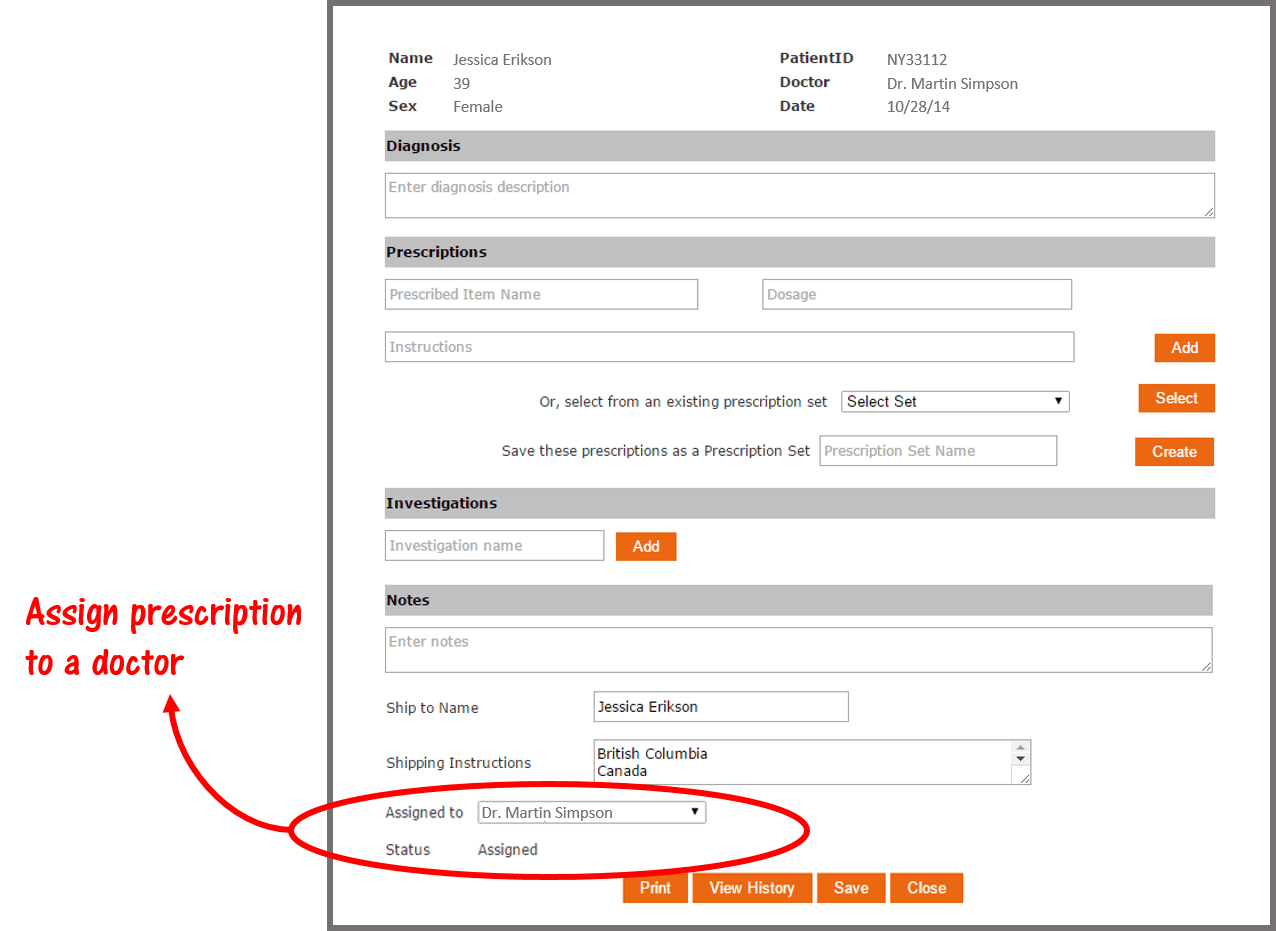
The doctor can open up the Prescription Report from the appointment book, filter prescriptions assigned to him that are not yet signed and sign them after reviewing. To sign a prescription, the doctor will have to confirm his signature with valid credentials.
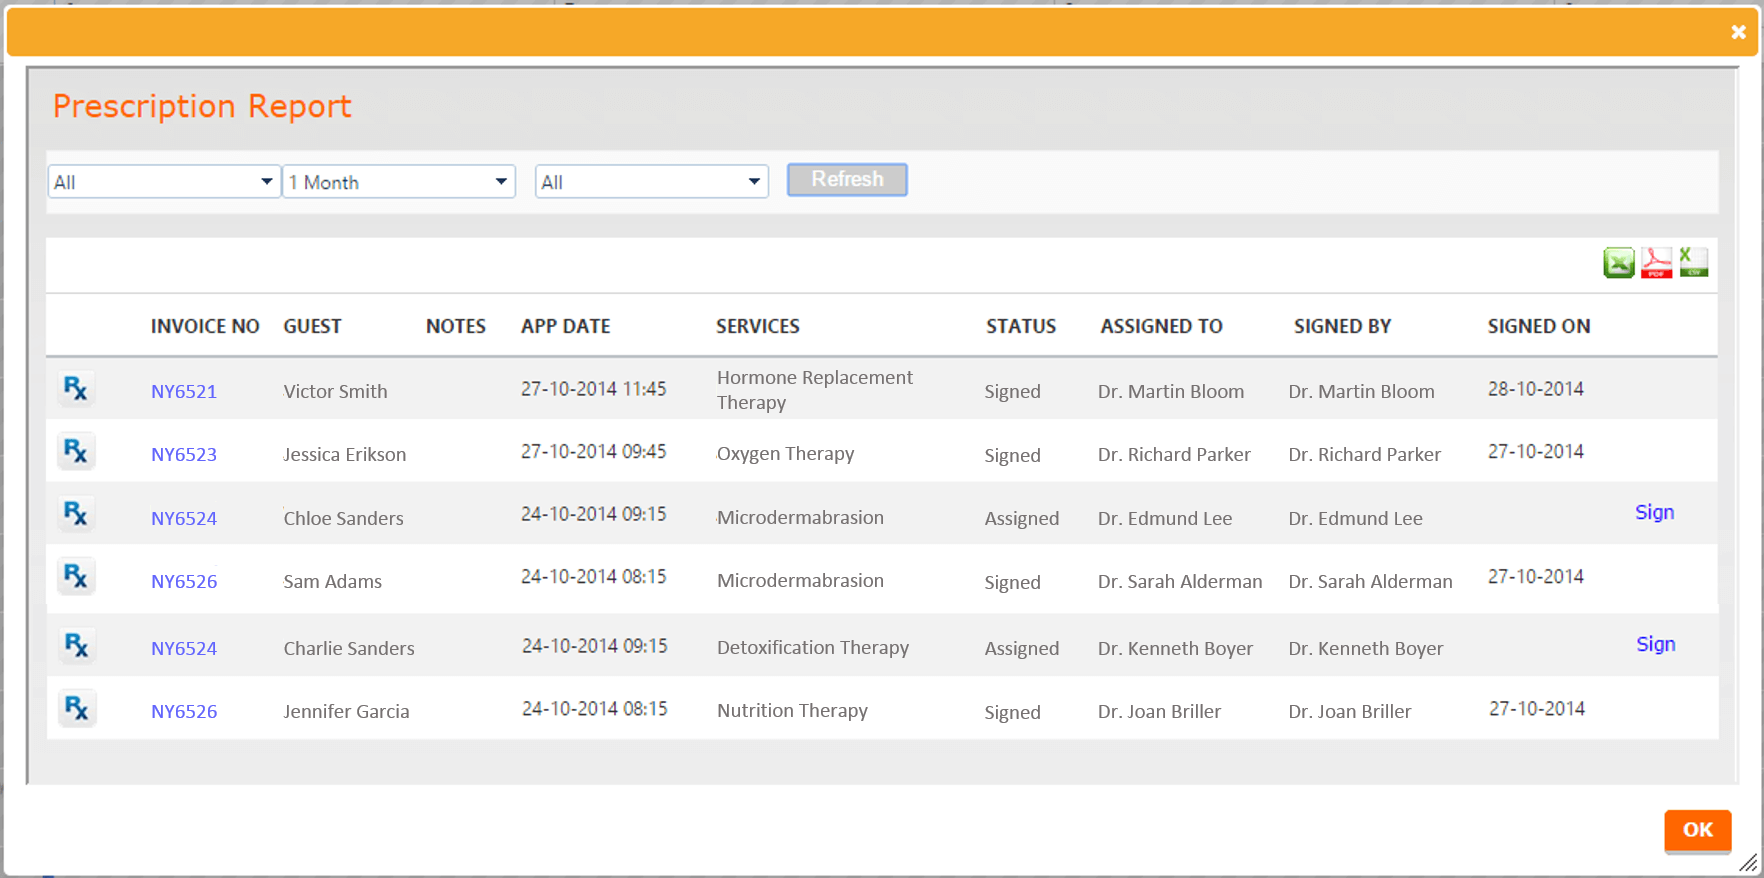
To enable signing of prescriptions, ensure you’re at the center level and navigate to Admin > Centers > Settings > General and select the check box “Enable Prescription Signing”. Make sure you’ve enabled prescriptions at both center and organization levels for your organization.
You’ll have to define which doctors are allowed to sign prescriptions. To allow a doctor to sign a prescription, go to the Employee module at the center level and click on the Employees link in the left column. Select the employee or the doctor and select the checkbox “Allow Prescription Signing” in the General tab.
The standard prescription format has been updated to include information like the doctors’ DEA registration number, State License Number, shipping & billing addresses and instructions.
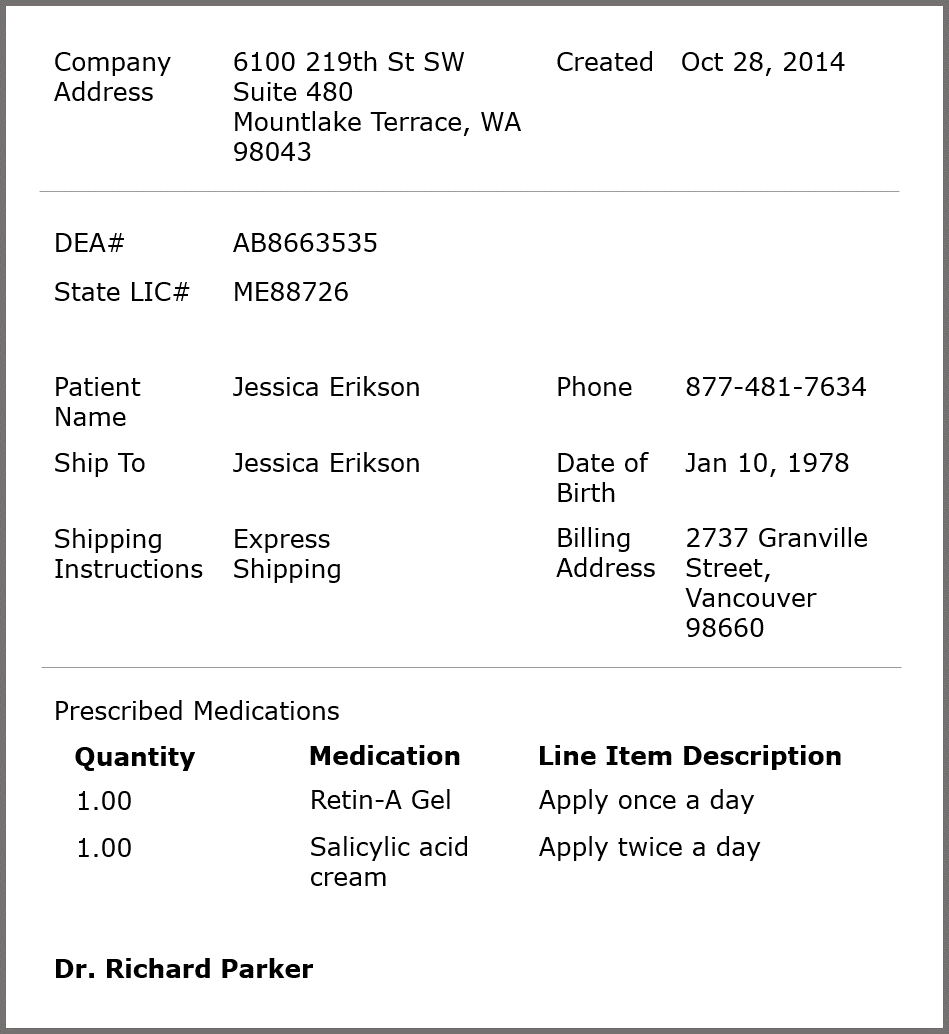
To change the format of the prescription, ensure you’re in the organization view, navigate to Admin > Organizations > Email/Texts and click on the Edit link for the “Standard Prescription” template.
If you’re going paperless, you can email prescriptions. Once the assigned doctor signs the prescription, the front desk can email it to the patient.
To send the prescription, click on the appointment block for the patient and select “Enter Prescription Data”. If the prescription is locked, you can click on the “Send Mail” button to email the prescription to the patient.
Prevent giving a center access to other center’s customer database. You can now disable the ability for front desk to search for clients at other centers in the organization. The search will be limited to only customers that have visited their own center. (Note that this limits the ability for a center to provide a seamless experience to customers that have visited another center.)
To restrict guest search for a center, ensure you’re in the center view, navigate to Admin > Centers > Settings > Appointment Book and uncheck the checkbox “Enable guest search across centers”.
To restrict guest search across all your centers, ensure you’re in the organization view, navigate to Admin > Organization > Settings > Appointment Book and uncheck the checkbox “Search for guests across centers”.
Often, services will include expensive products. For example, a service priced at $100 might use $20 worth of products. You may want to award commission on the service price after the product cost has been deducted. So, the commission would be calculated for a service value of $80, rather than the full $100 price.
This feature enables you to identify other costs as part of a service that you may wish to deduct for commission calculations.
To set up this new commission structure, ensure you’re in the organization view, navigate to Admin > Organization > Settings > Employee and select the checkbox “Deduct internal costs for employee commissions”.
If you need to look up whether a prescription was created for an appointment, you can view this from the Guest’s profile.
In the Appointments tab of the guest profile, you will see one of two icons:

Indicates that this guest was not given a prescription for this appointment. Click on the icon to create a prescription.

Indicates that this guest was given a prescription for this appointment. Click on the icon to see the prescription.
Always On Campaigns™ allows you to set up automated marketing. With this upgrade, you can also have the system create a new sales opportunity when a communication is triggered.
For example, if you are using Always On Campaigns™ to send out a membership renewal email 30 days before the membership expires, the system will also create a sales opportunity and assign an owner. This ensures that someone follows-up on the membership renewal, in addition to sending out the email message.
If you have multiple centers in your organization, you can assign a sales opportunity to a different center. For example, if a guest calls you New York center, but actually needs follow-up from your New Jersey center, you can create that sales opportunity for the other center.
To change the center for an opportunity, ensure you’re at the center level, navigate to Sales > Opportunities > General and change the center from the drop-down.
When you change the center for an opportunity, the system will ask you if you also want to move the guest to the selected center. You can click on Cancel if you want to move only the opportunity to that center.
We’ve added two new reports in your Daily Reports – Daily Financial Summary and Monthly Financial Summary.These reports consist of detailed summary of all your financial transactions for the day or the month.
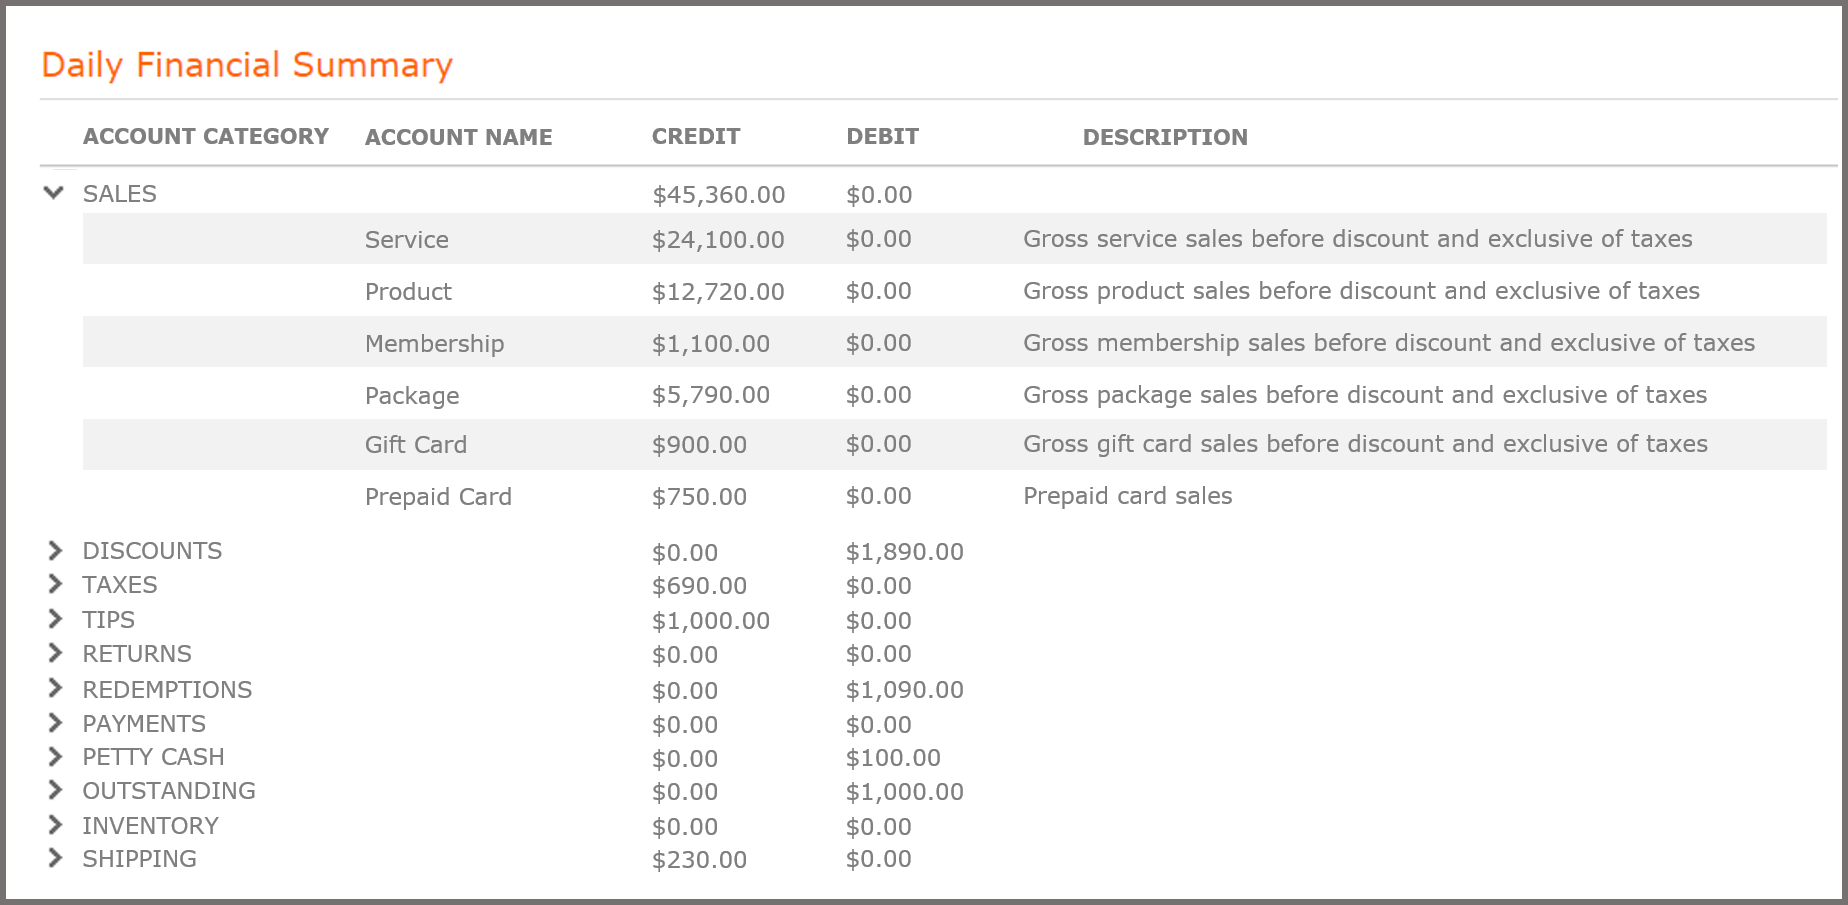
To access these reports, click on the Daily Reports link in the Admin page of a center and select these reports from the drop down menu.
To learn more about this upgrade, contact support.
.png)

Beauty, wellness and fitness businesses love Zenoti. 1,000+ reviews and counting.


